Saturday, March 26, 2011

Percussion Ensemble Penn State 1987-1988


Elaine, Doug, Vince,Nick


Vince putting Elaine in a choke hold on the ride back (for fun....)

Doug, Elaine, Kevin. This was a favorite picture of mine I had hanging up in my dorm for a long time.
Such a great group of musicians.


The only proof I was on the trip since I took all the pictures. I think I was documenting events in a journal and Doug stole it from me for a bit. Kevin was creeping.


One of our recital programs from 1988


Elaine and Larry


Friday, March 11, 2011

Percussion Ensemble 1987-88 (14 photos), by Kim Murray


I'd like to share my Snapfish photos with you. Once you have checked out my photos you can order prints and upload your own photos to share.
Click here to view photos

Saturday, January 22, 2011

Reindeer cookies

Every year I make my world famous Rudolph cookies. They're from a recipe book from St. James Presbyterian church which I helped put together in ohhh 1993 or 4? (the recipe book, not the church) That's back before internet when we had to type out recipes and submit them to a company for publishing, then sold them to church members as a fundraiser. so cute. 
 The kids had to help. That's the whole point.


 Here's Alexa making reindeer faces.
Jack helps too.
Kat making cookies
This is what they're supposed to look like. Cute button nose with red licorice. Chocolate chip eyes. Pretzel antlers.

This is an example of what Jack made. Massive antler-itis and Pinochio nose.
I love Jack.


Friday, November 19, 2010

Mob Caps or "Cheer Bonnets"

Next craft project....

Was out shopping with Juli and Liz on the Day of the Competition Prep Party and realized I hadn't yet gotten the cheer bonnets for the girls even though I was in charge of all the hair! These were an envied hit last year on other teams. I knew I had to make them and pronto. We stopped at JoAnn's for fabric and I found some awesome Patriotic prints, the one I got was only  $3/yard! I debated on the string and ended up getting 3 kinds. I looked at patterns quickly to make sure I was on the right track and studied some Historic Costume pattern books quickly to see how the bonnets were made. Some were fancy with lace and layers, but I knew I could easily copy the drawstring idea with some fabric glue. I settled on some fabric glue that is partly sticky upon application then seals with the iron. 


Cutting out circles and measuring string...
 Next was the tricky part. Trying to fold over a seam with the string inside and glue the edges down without gluing the string to the fabric. It took some trial and error since I didn't have time to pin or plan, but I figured out the square worked better than circle, and folding in the edges flat was the way to go. Pull the string after each press to make sure it's not stuck. I glued the corners in some too but once they were in bonnet shape, the corners tucked under nicely and you couldn't see them. 

It took about an hour to cut and glue 12 cheer bonnets. And here's the end result:


This was the morning of the competition, after they slept on it. The night before, I put all their hair up in ponytails, rolled it in curlers, sprayed it down, and stuck on the caps. They slept in it like that, and got to wear their matching bonnets for a few hours in the morning, then we took it out and voila!


 7-9 year old Ellicott City Patriots Squad


 Side view. Some Blue strings and some Silver ribbons. I liked the silver and will go with that next year.
 Fabulous Cheer curls protected by handmade Cheer Bonnets. So cute! Can't wait to do it again next year.

Saturday, October 2, 2010

Butterfly Cake

Alexa requested yet another cake for her birthday, so for the Murray family party at Juli's I whipped up a butterfly darn quick. Only 2 hours for baking, cutting, crumb coat, napping, then decorating. I managed to pull it together while napping during all the wait times. Then I realized I had no way to transport it to Juli's in the car. So I thought it best to capture the before pictures and skip the after. It only slid a little.


I'm actually thinking I may have done it upside down. Do the big wings go at the top or bottom of the butterfly? Amanda got to help with the decorating once she came home from school, so I let her add gummy bugs the whole way around and we added a grass area just to stuff more candy into the mix.

It was definitely fun and a big hit. I'd love to do it again when I have more time to add detail. It was very easy to make!

Try Howdini's You Tube Betty Crocker Site here....

Thursday, September 23, 2010

Fire Truck Cake

Well, here goes.

Jack Jack or 'Baby Jack' turned 2 on Sunday. Alexa's really been into watching YouTube videos recently about cake decorating. I guess she's working on her new career. So the girls decided we had to make the Fire Truck cake from Howdini. We saw some tutorials about Car cakes but they looked impossible to make with the supplies we had. Howdini is from Betty Crocker and uses simple kitchen items and easy ingredients, most importantly boxed cake and tubs of frosting.

Fire Truck Birthday Cake


We started out coloring our frosting. Each girl got a white tub and added drops of red gel dye until it was the right color, which meant we used the whole tube since it never got to the color we wanted. The tutorial specifically said to use the gel dye and I do think it worked better and didn't stain anything like the other drop bottles do.

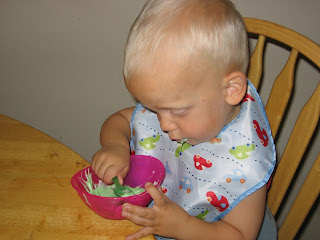
Jack wanted to help. It was his birthday after all. I gave him some green to mix up since we didn't need green for the truck.
While I got the girls involved in decorating their own cakes with the scraps, I started building the truck. I made 3 loaf pan size cakes with one box of yellow cake. (Betty Crocker of course.)
I leveled off the tops which provided the extra parts for the girls to build with, and then constructed them into this shape:

I just lined a cookie sheet with foil for the base. Use frosting to stick all the parts together and to the base.

Next is the crumb coat. Using your final color, put frosting over the whole cake and put in the fridge for an hour. This gave me time to run out to the store and get all the candies we needed. And Oreos.


Here's the Crumb Coat. A week ago, when we were discussing which cake to try for the party, I mentioned how we had to plan ahead and leave time for the first coat of frosting to dry. Alexa said, "Mom, it's called the Crumb Coat."


 Next was the second coat of frosting and the decorating.

Alexa's surreptitiously holding the DOTS hoping that the recipe calls for her to eat one in advance.
  • Gray frosting for accent.
  • Oreo cookies for wheels.
  • DOTS for sirens and lights.
  • Twizzlers for ladder and hoses.


 Finished project! It was a big hit! We're going to try the Butterfly cake tomorrow.

Sunday, September 19, 2010

First Attempt at Blogging

Made an awesome cake today and had fun with the kids. Baby Jack turned two. Except for the fleas, it was a good day. Well, and driving in a pickup with 3 adults in the front seat. That wasn't so safe. But it was fun. If I have time tomorrow, I'll post the tutorial about the fire truck cake. I'm already thinking of what supplies I need to make it easier and how I'll improve on it next time. Yikes, I may have to start being creative again.